Steps to Create Custom Gradient to Layer in Photoshop CC
- You can apply a color gradient to all or part of a layer. Select the desire layer, where you want to apply gradient fill, to make it active. For example: Select the MAUI layer to make it active.
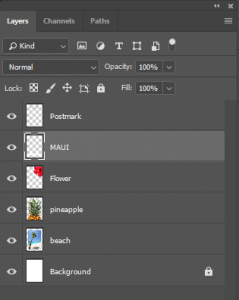
- Right-click the thumbnail
 in the MAUI layer and choose Select Pixels from the context menu. Attention! If you don’t get select pixel it means you might right-clicked on the blue part of the highlighted layer, instead on the thumbnail.
For Example: You will see “marching ants” around all the white lettering like in the following example:
- Click the Foreground Color Swatch. For example:Select a bright orange from the color picker (Try R=250, G=116, B=0) and click OK.

- In the Tools panel, select the Gradient tool.
 ( Gradient tool (G), creates a gradual blend between colors)
 - In the Options bar, make sure Linear gradient is selected.

- Click the arrow in the gradient editor box to open the gradient picker.
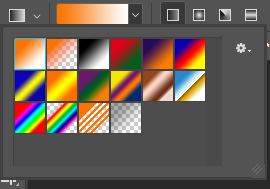
- Select the Foreground to Background swatch (first one).
- Click anywhere outside the gradient picker to close it.
- With the selection still active, drag the gradient tool from the bottom to the top of the letter A (press the SHIFT key as you drag if you want to make sure you’re dragging straight up).
 For example: When you let go, the letters in the word MAUI go from orange to white (bottom to top). Click at the bottom of the A and drag straight up to get this color shade from orange to white.
 - Go to Select -> Deselect (Ctrl + D or Cmd + D)
- Save your work. (Ctrl + S or Cmd + S)
Follow these easy steps to create custom gradient to layer in Photoshop CC.